4×8 Plywood Sheets: Standard Dimensions and Manufacturing Specifications – Complete Guide
The term “4×8 plywood” sounds exact, but there are small differences that can throw off real projects. Builders use plywood for walls, cabinets, and floors, so size and specs matter—a lot. Cuts, loads, and costs all depend on getting the details right.
A standard 4×8 plywood sheet has nominal dimensions of 48 by 96 inches, but the actual size often measures about 47‑7/8 by 95‑7/8 inches due to trimming and sanding during manufacturing. Layouts based only on nominal size can leave gaps or force you to rework things.
The Exact Dimensions: Nominal vs. Actual Sizes
Plywood sheets use nominal labels that don’t match exact measurements. The difference comes from unit systems, factory trimming, and allowed tolerances that affect real plywood dimensions and fit.
The 4′ x 8′ Standard in Metric & Imperial
The standard plywood size called 4′ x 8′ comes from the imperial system. In exact terms, that equals 48 x 96 inches.
When converted, it measures 1219 x 2438 mm, which isn’t a clean metric number. Most standard sheets sold in the U.S. measure slightly less after manufacturing. A common actual size is 47-7/8 x 95-7/8 inches.
Mills trim and sand panels to square the edges. This helps with stacking, shipping, and edge quality.
Table 1: Exact Size Conversion
| Label Size | Nominal (in) | Metric (mm) | Typical Actual (in) |
| 4 x 8 | 48 x 96 | 1219 x 2438 | 47-7/8 x 95-7/8 |
Plans based on a full 48 x 96 inches can cause gaps.
Understanding Tolerance & Squareness
Plywood sizes allow small tolerances. Industry standards permit about ±1/8 inch in length and width.
This range exists because veneers shift during pressing and sanding. Squareness matters as much as size.
A sheet can meet plywood dimensions but still cause problems if it’s not square. Installers check this by measuring both diagonals. If the diagonal lengths differ by more than 1/8 inch, the panel forms a parallelogram, not a rectangle.
This leads to visible gaps during cabinet or wall installs. Cuts won’t line up, even when measurements look correct. Checking squareness before cutting saves material and a lot of frustration.
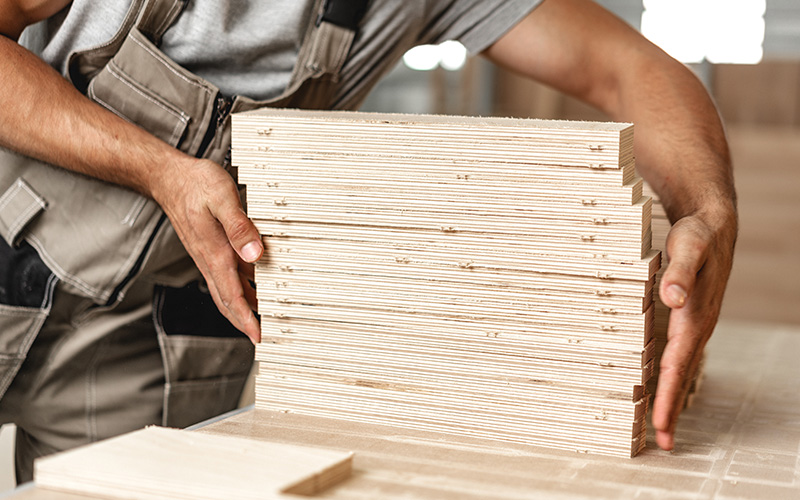
Thickness and Ply Construction: The Strength Factor
Thickness, layer count, and core type define how a 4×8 plywood sheet performs under load, holds fasteners, and resists warping. These factors work together, and even small differences can change how the panel behaves in real use.
Nominal vs. Actual Thickness
Plywood thickness uses nominal sizes, not exact measurements. A sheet sold as 3/4 inch usually measures 23/32 inch.
Manufacturers sand panels after pressing, which removes material and creates the gap between labeled and real size. Joinery has to match actual thickness, not the label. Dados, rabbets, and edge banding won’t work if you rely on nominal numbers.
Table 2: Thickness, Ply Count, and Common Uses
| Nominal Thickness | Actual Thickness | Typical Ply Count | Common Use |
| 1/2″ | ~15/32″ | 5–7 plies | Drawer sides, shelves |
| 3/4″ | ~23/32″ | 7–11 plies | Cabinets, furniture |
| 18 mm | 18 mm true | 9–13 plies | Baltic birch plywood |
Metric panels like Baltic birch plywood avoid this issue because they ship at true thickness.
The Role of Ply Count (Layers)
Ply count matters as much as thickness. Each layer runs perpendicular to the next, which limits movement because wood can’t expand freely in one direction.
Imagine a stack of cards. If all cards face the same way, the stack bends easily. But if each card turns 90 degrees and bonds together, the stack stiffens. Plywood works the same way.
More plies mean thinner veneers. Thin veneers reduce voids and spread stress evenly. Marine plywood and Baltic birch plywood use high ply counts, which helps them resist bending and splitting. Shelves sag less, and panels hold screws better.
Core Types Impact
The core controls weight, flatness, and screw holding. Veneer core panels use solid wood layers. They stay lighter and grip fasteners well, making them good for cabinets and structural uses.
Most softwood plywood and exterior plywood use this core. MDF core plywood places fiberboard between face veneers, creating a very flat surface since MDF has no grain.
This helps with painted panels, but it adds weight and weakens screw holding at edges. Particleboard core costs less but chips easily and holds screws poorly. Cabinets or shelves made from this won’t last as long, especially under repeated load.
Visual Grading Systems: A, B, C, and D
Plywood grades describe how the visible surfaces look, not the sheet size or thickness. These letter grades help buyers match appearance needs with cost, especially when one face stays visible and the other stays hidden.
Face & Back Grades Explained
Each 4×8 plywood sheet receives a grade for the face and a grade for the back. The stamp reads as a pair, such as A/A, A/C, or C/D. The first letter names the exposed face.
A-grade faces are sanded smooth and limit defects to tiny pin knots. This surface works for paint or clear finish, including sheets with a hardwood veneer like birch or maple.
B-grade allows small, tight knots and visible repairs.
C-grade shows larger knots, filled splits, and color changes.
D-grade permits open knots and rough areas.
Because each side gets its own rating, buyers can control cost by placing the lower-grade side against a wall or frame.
Table 3: Visual Grade Quick Reference
| Grade Pair | Face Appearance | Typical Use |
| A/A | Smooth both sides | Visible panels |
| A/C | Finished face, utility back | Cabinets, shelving |
| C/D | Rough both sides | Framing, subfloors |
What is “Cabinet Grade” vs. “Construction Grade”?
“Cabinet grade” and “construction grade” describe intent, not an official standard. Cabinet grade panels use A or B faces, often with a hardwood veneer and a stable core.
Manufacturers sand these faces flat, so the surface accepts paint or clear coat evenly. This means less filling and less prep before finishing.
Some cabinet panels come prefinished with a factory-applied UV coating. This coating cures hard and even, so builders can skip on-site finishing and keep color consistent.
Construction grade panels focus on structure. Common examples include C/D or CDX plywood used for walls, roofs, and floors. These sheets use exterior-rated glue, which resists moisture. The panel holds fasteners and stays intact, even when hidden behind drywall or siding.
Weight Specifications & Logistics Planning
Weight affects material choice, transport method, and jobsite safety. Knowing sheet weight helps reduce damage, prevent injury, and avoid transport issues before work even starts.
Estimated Weights by Thickness
A standard 4×8 plywood sheet weighs more as thickness and wood density increase. Wood species matters because denser fibers add mass even at the same size.
Table 4: Estimated 4×8 Sheet Weights
| Thickness | Softwood | Hardwood | Baltic Birch | Marine |
| 1/4 in | ~22 lb | ~25 lb | ~26 lb | ~27 lb |
| 1/2 in | ~40 lb | ~45 lb | ~48 lb | ~50 lb |
| 3/4 in | ~61 lb | ~68 lb | ~72 lb | ~75 lb |
Birch and marine panels weigh more because they use dense veneers and more glue layers. This gives better stiffness and load capacity but makes handling tougher. Moisture also adds weight—sheets stored outdoors can weigh 10–15% more than dry stock.
Transporting 4×8 Sheets Safely
A full 4×8 sheet rarely fits inside a standard SUV. Most people rely on a pickup bed, flatbed trailer, or a roof rack rated for sheet goods.
Wind lift is a real risk when driving. Air flows under the panel, so an unsecured sheet can flex or pull free at highway speed. To prevent this, drivers should:
- Stack sheets flat, not on edge
- Use two ratchet straps across the width and one lengthwise
- Place a non-slip mat or scrap plywood under the load
For roof transport, the rack must support at least 75–100 lb. It’s smart to limit speed and check straps after the first mile.
Handling Tips for Solo Workers
Solo handling gets tricky once sheet weight passes 50 lb. A 3/4 in hardwood panel often exceeds this limit, raising strain risk.
A panel carrier tool clamps onto the sheet edge and shifts the load to the forearm. This reduces grip force and lowers wrist and back stress during short carries.
For longer moves, sliding the sheet is often easier than lifting. One common trick is using a scrap board as a sled—tip the sheet onto the board, then drag it across the floor. It trades lifting for friction, which is much safer for one person.
Working with Full Sheets: Cutting & Finishing Tips
A full sheet of plywood measures 48 × 96 inches and often weighs 50–80 pounds at 3/4-inch thickness. Size and weight affect safety, cut accuracy, and edge quality, so the process matters just as much as the tools.
Breaking Down a Full Sheet (The Cutting Plan)
A full sheet of plywood feels awkward to handle. Its size shifts the weight while you cut, which can bind the blade and cause kickback.
Most builders skip the table saw at first. They grab a circular saw and a straight edge guide to break the sheet down.
Setting the sheet on rigid foam or scrap boards on the floor helps. This supports the cut line and keeps the panel from sagging.
Set the saw blade about 1/8 inch deeper than the sheet. This reduces tear-out on the bottom face.
Cleaner edges mean less sanding later. No one wants to spend extra time fixing rough cuts.
Safe breakdown order
- Crosscut the sheet into shorter panels first.
- Rip panels to final width after they’re smaller.
- Move to a table saw only when pieces feel stable.
Preventing Tear-out (The “No-Splinter” Technique)
Plywood tears out because its face veneer is thin—usually not even 1/32 inch. If the blade lifts too fast, it pulls fibers up before cutting cleanly.
Try blue painter’s tape over the cut line. The tape holds fibers in place as the blade passes through, so you get fewer chips along visible edges.
Blade choice matters too. An 80-tooth carbide blade takes smaller bites than a 40-tooth blade, so it shears fibers instead of ripping them.
Other tricks help as well:
- Cut with the good face down when using a circular saw.
- Use a sharp, plywood-rated blade.
- Feed the saw slowly and steadily.
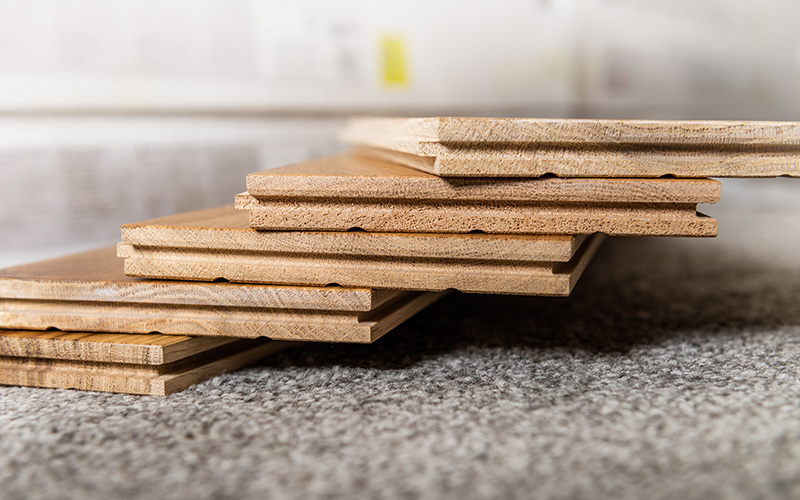
Dealing with Exposed Edges
After cutting, plywood shows its layered core. That exposed edge can really stand out against a clean surface.
Edge banding hides the layers. Most banding is real wood veneer with heat-activated glue.
Use a household iron on cotton heat to apply it. Heat melts the glue, pressure bonds it, and cooling locks it in place.
It leaves a smooth edge that takes stain like solid wood. That’s a big improvement over the raw ply look.
Trim the excess with a flush-cut tool or a sharp chisel. A quick sanding flattens the finish.
Cost Analysis & Buying Strategy
A 4×8 plywood sheet’s price jumps around based on wood species, glue, grade, and where you buy it. Matching these details to your project can save money and headaches.
Price Factors
Wood species sets the base price. Birch plywood runs higher than pine since birch comes from slower-growing hardwoods.
Smoother faces and tighter grain make birch great for cabinets and furniture. Pine’s rougher, but it’s easier on the wallet.
Glue type matters too. Exterior plywood uses phenol-formaldehyde adhesive that stands up to moisture, so it costs more.
If you’re working in a kitchen, bath, or covered outdoor spot, it’s worth the price for fewer failures.
Origin and grade also play a role. Imported panels often cost more because of shipping and tariffs.
Higher grades (A or B faces) cost more since mills remove knots and patches. You get a cleaner surface and less prep work.
Where to Buy
Big box stores like Home Depot and Lowe’s stock standard 4×8 sheets in 1/2-inch and 3/4-inch. It’s convenient, but you’ll find limited grades and some sheets aren’t perfectly flat.
Local lumber yards usually offer more grades, cores, and species. Many carry cabinet-grade birch or maple with fewer voids.
Sheets from regional mills often stay flatter. Some yards only sell to contractors, so it’s smart to ask about retail sales before you go.
Checklist: How to Inspect Before You Buy
Give each sheet a quick check before you pay. Small defects can turn into big problems fast.
- Check for warping: Stand the sheet on edge and look down its length. If it bows, your cuts won’t stay square.
- Inspect the edges: Look for core voids or gaps. Voids weaken screw holding.
- Verify thickness: Nominal sizes aren’t exact. A “3/4-inch” sheet often measures about 23/32 inch, which can mess with joinery.
- Scan the face: Count patches and knots. Fewer repairs mean less sanding later.

Frequently Asked Questions
How are plywood sheets graded and classified for manufacturing?
Plywood faces get graded with letters, usually A through D. An A face is smooth with few repairs, while a D face allows knots and patches.
A-grade faces work best for visible cabinets. Lower grades are fine for framing or subfloors.
Sheets also have exposure ratings like Interior, Exposure 1, or Exterior. The adhesive type determines the rating.
Exterior plywood uses phenolic glue, so it stands up to moisture and weather.
What sizes do plywood sheets come in apart from the 4×8 dimension?
Besides 4×8 sheets, mills make 2×4, 4×10, and 4×12 panels. Longer sheets mean fewer seams on walls or roofs.
Covering more area per panel cuts install time.
Some hardwood plywood comes in 5×5 sheets, especially Baltic birch. This size fits metric machinery in European mills.
Square sheets are handy for cabinet layouts with equal-length parts.
How do the nominal and actual dimensions of plywood sheets differ?
A 4×8 label shows a nominal size of 48 by 96 inches. Actual sheets usually run a bit smaller, like 47-7/8 by 95-7/8 inches, thanks to trimming and sanding.
Always base your cut lists on measured size, not the label.
Thickness works the same way. A nominal 3/4-inch sheet usually measures 23/32 inch.
This affects dado depth, shelf fit, and hardware alignment.
What factors determine the quality and use of different types of plywood?
Wood species shapes both strength and surface look. Fir plywood handles structural loads well.
Birch, on the other hand, shows off a smooth face that takes paint or a clear finish nicely.
Matching the species to the job helps prevent early wear or disappointing finishes.
Core type changes things, too. Veneer cores keep a decent balance between strength and weight.
MDF cores stay reliably flat for panels, though they feel heavier.
Adhesive type, veneer count, and thickness tolerance all play their part in stability and screw holding.
Moisture resistance depends on these factors, too. It’s a lot to keep in mind for what seems like a simple sheet of wood.
Learn More About Our Products?
Contact Now